How to Make DIY Leaf-Imprint Concrete Stepping Stones for Your Garden Path
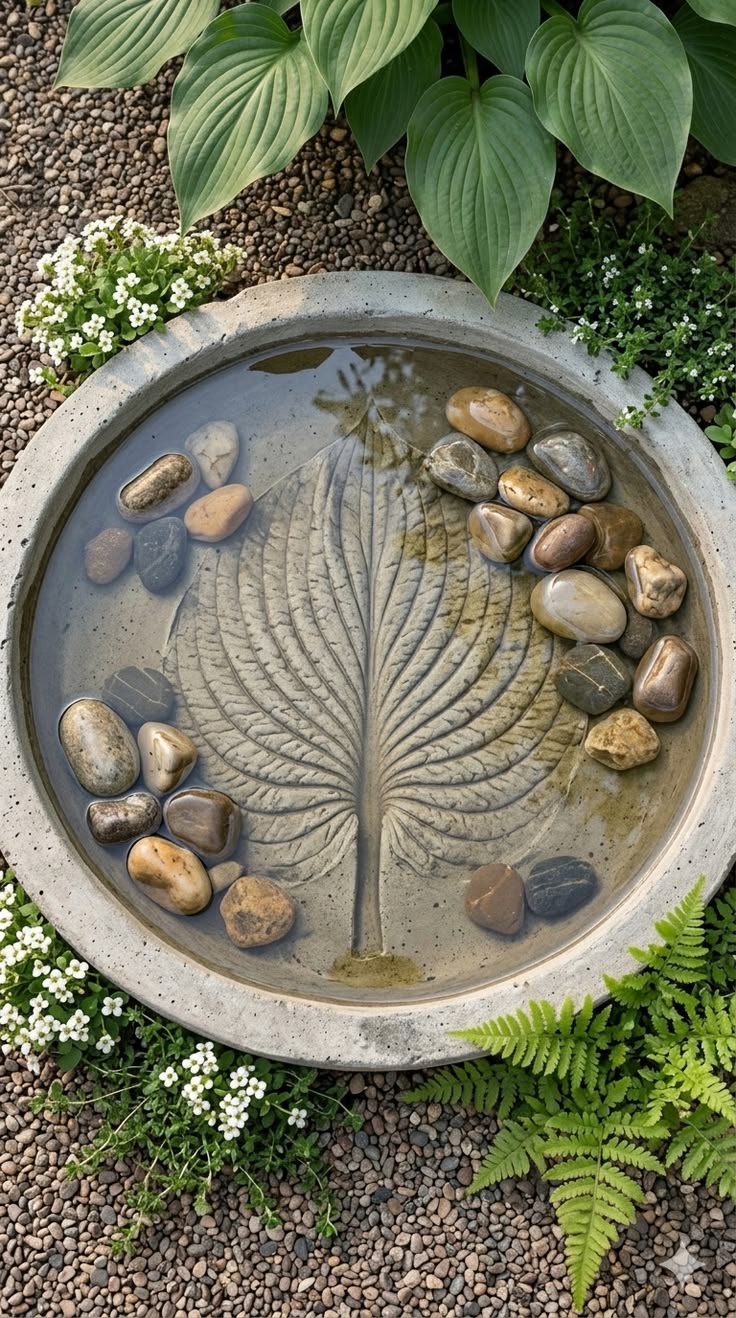
If you loved the idea behind our leaf-imprint stone bird bath, this project takes the same technique in a new direction. Instead of casting a leaf into a basin shape, you’ll cast it flat, creating a stepping stone with a real, textured leaf pattern pressed permanently into the surface.
It’s one of the easiest garden crafts to start with. No power tools, no special skills, and one bag of concrete mix can make a small path’s worth of stones over a weekend.
Why This Project Works So Well
A store-bought stepping stone looks the same as every other one at the garden center. A leaf-cast stone is one of a kind. Every vein, curl, and imperfection in your chosen leaf transfers into the concrete, so no two stones ever look identical. It’s also one of the cheapest ways to add a designer touch to a garden path: a single bag of concrete mix runs a few dollars and makes three or more stones, depending on size.
What You’ll Need
- Large leaves with strong vein texture (rhubarb, hosta, elephant ear, squash, or burdock leaves work best; the bigger and more deeply veined, the better the imprint)
- One bag of pre-mixed concrete or mortar mix
- A mixing tub or wheelbarrow
- A trowel
- Plastic sheeting or a large trash bag
- Sand (enough to build a shallow mound for each stone)
- Vegetable oil or cooking spray
- Work gloves
- A section of chicken wire or hardware cloth, cut slightly smaller than your leaf (optional, but recommended for stones larger than 12 inches)
- Concrete sealer (optional, for color protection and longevity)
- Concrete color pigment or a wash of exterior paint (optional)
Step-by-Step Instructions
1. Choose and Prep Your Leaf
Pick a leaf that’s large, firm, and has raised veins on the underside; that texture is what will show up in the finished stone. Trim the stem close to the base of the leaf so it lies flat. Lightly coat the veined (underside) surface with vegetable oil or cooking spray. This keeps the concrete from bonding to the leaf so it releases cleanly once cured.
2. Build a Sand Mound as Your Mold
Lay your plastic sheeting on a flat, level work surface, ideally outdoors or in a garage. Pour a mound of sand roughly the size and shape of your leaf and pat it into a gentle dome, about 1 to 2 inches high in the center. This dome gives your stone a slightly curved underside and helps the concrete settle evenly around the leaf.
3. Position the Leaf
Place the leaf veined-side up on top of the sand mound, pressing it gently so it follows the curve of the dome.
4. Mix the Concrete
Following the ratio on your concrete mix bag, add water gradually until the mixture reaches a thick, moldable consistency, similar to brownie batter. Too much water weakens the finished stone, so add water slowly rather than all at once.
5. Cast the First Layer
Spoon or trowel a layer of concrete directly onto the leaf, about half an inch thick, working from the center outward and covering the entire leaf surface. Gently press the concrete into the leaf’s edges and veins so the texture transfers clearly.
6. Add Reinforcement (For Larger Stones)
If your stone is wider than about 12 inches, lay a piece of chicken wire or hardware cloth over this first layer, keeping it about 2 inches back from the edge. This keeps the stone from cracking under foot traffic or seasonal freeze-thaw movement.
7. Add the Final Layer
Add a second layer of concrete over the reinforcement, building up to a total thickness of about 2 to 3 inches. Smooth the edges with a gloved hand or trowel, shaping the stone into a clean, rounded outline.
8. Cure Slowly
Cover the stone loosely with plastic to slow the drying process and prevent cracking, and let it cure undisturbed for 48 hours before handling. Keep it out of direct sun during this time.
9. Unmold and Reveal
After the initial cure, carefully flip the stone over and peel off the sand from the back. Turn it right-side up and gently peel away the leaf. You’ll be left with a crisp, detailed leaf imprint pressed into the surface.
10. Cure Fully Before Use
Let the stone cure for a full week before walking on it or exposing it to water. This full cure is what gives concrete its final strength.
11. Optional: Color and Seal
Once fully cured, you can leave the stone in its natural gray, or brush on a thin wash of exterior concrete paint to highlight the leaf detail. A coat of concrete sealer afterward will protect the color and help the stone resist weathering for years.
12. Place in the Garden
Set your finished stones directly into soil, mulch, or a shallow bed of leveling sand along your garden path, spacing them for a natural walking stride.
Tips for Best Results
- Make several stones from different leaf varieties in one batch; a mixed path of hosta, rhubarb, and squash-leaf imprints looks more natural than repeating the same shape.
- Work in the cooler part of the day. Concrete cures faster than expected in direct sun or high heat, which can cause cracking.
- If a stone cracks slightly during unmolding, don’t discard it. Hairline cracks in a rustic stepping stone often just add character, and a bit of sealer will stabilize it.
- Keep stones out of freezing temperatures for the first month while they finish curing fully.
Variations to Try
- Multi-leaf cluster stones: overlap two or three smaller leaves before casting for a layered, botanical look.
- Tinted stones: mix concrete color pigment directly into the batch for a terracotta or slate-gray tone instead of painting afterward.
- Numbered or lettered stones: press small house-number stamps or letter stencils into the wet concrete alongside the leaf for a personalized path.
- Mini stepping stones: use smaller leaves (hosta, geranium, or maple) to make a set of small accent stones for a container garden or potted plant border.
Frequently Asked Questions
How long do leaf-imprint concrete stepping stones last? With a proper cure and an occasional reseal, these stones can last well over a decade outdoors, similar to any concrete garden feature.
Can I use fake or dried leaves instead? Fresh, pliable leaves give the cleanest imprint. Dried or brittle leaves tend to tear or shift during casting, which blurs the texture.
Do I need to reinforce every stone? Small stones under about 12 inches across generally hold up fine without reinforcement. Larger stones benefit from the added wire mesh to resist cracking underfoot.
What’s the cheapest way to source large leaves? Rhubarb and squash plants are common in home gardens and produce some of the largest, most deeply veined leaves for this project. Neighbors or a local community garden are often happy to share a few leaves if you don’t grow your own.